Design your page
Banners and cover images
The banner is the picture at the top of your page and the image people see when you share the link. There are six kinds, and all of them are free.
Updated
Choose a banner type
On a new event, click Choose Banner Type at the top of the page. On an event that already has a cover, click the cover and choose Change cover photo. The same dialog opens.
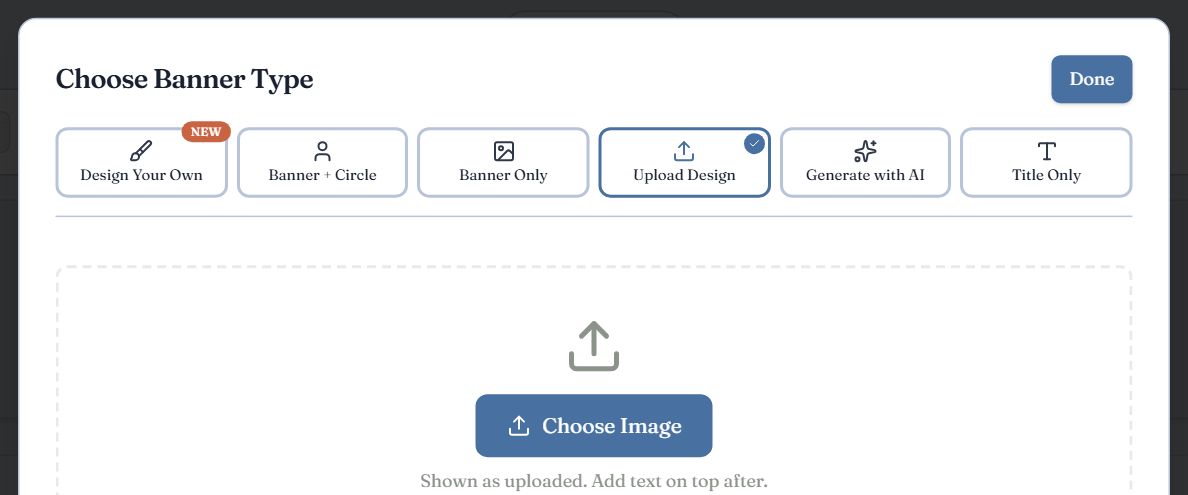
- 1Design Your Own. A photo invitation with your own text on it.
- 2Banner + Circle. A wide banner with a round photo overlapping it. Good for a portrait of the guest of honor.
- 3Banner Only. A wide banner, from the ready-made library or your own upload.
- 4Upload Design. A finished graphic, for example an invitation you made in Canva. Shown as uploaded, never cropped.
- 5Generate with AI. Describe the event and get a banner drawn for it.
- 6Title Only. No picture. The page opens with your title.
Press Done when the banner looks right. You can come back and switch type at any time.
Pick a ready-made banner
Choose Banner Only or Banner + Circle and stay on the Browse tab.
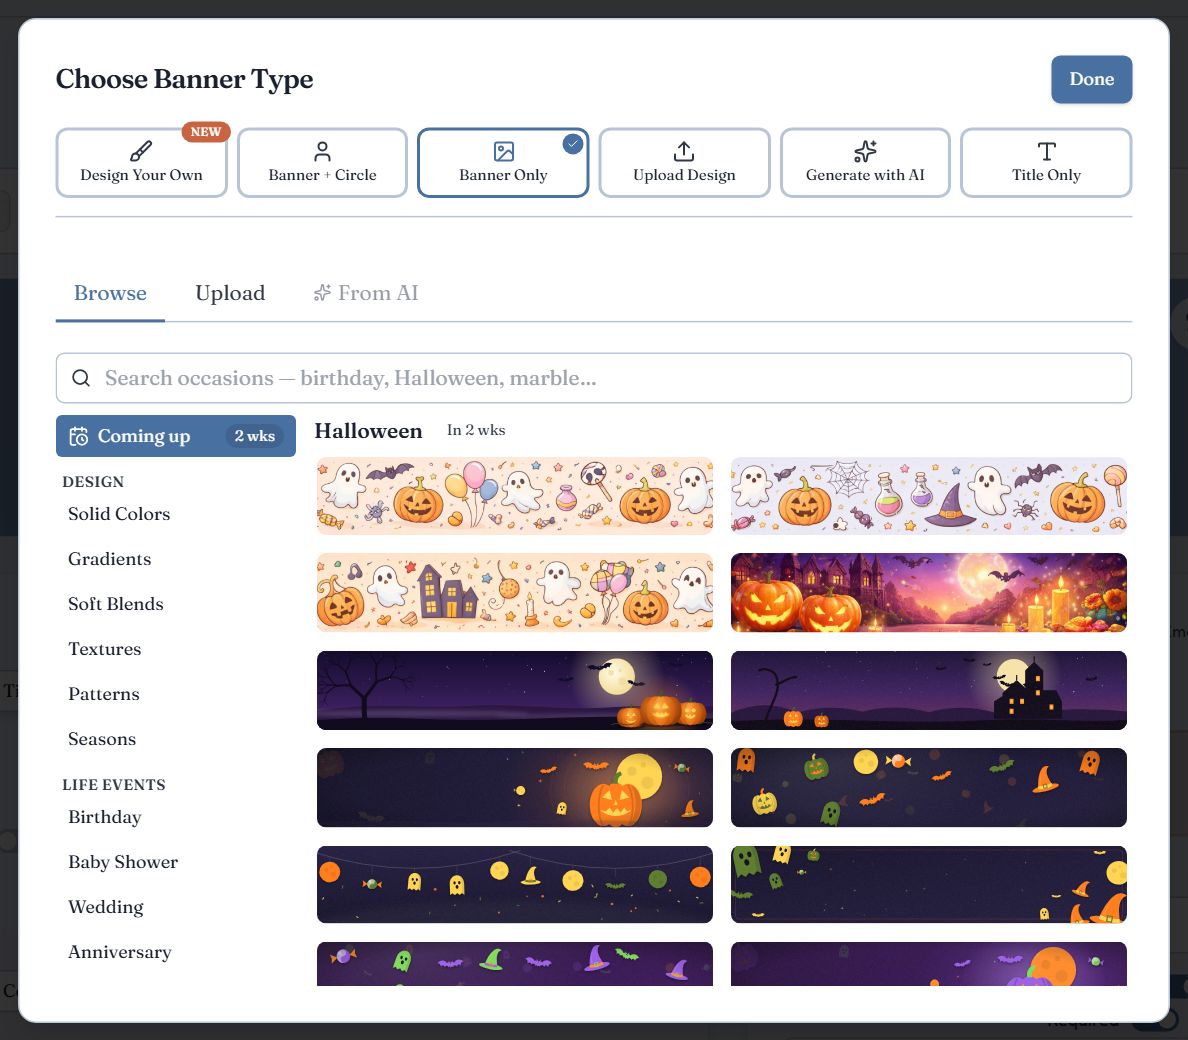
Search by occasion, or use the category list. Holidays in the next few weeks lead the list under Coming up.
- Design holds solid colors, gradients, soft blends, textures and patterns for a quiet page.
- Life events and holidays each offer four layouts of the same artwork: Spotlight, Scatter, Garland and Corners.
- Click a banner to use it. It is saved with your event, so later changes to the library never alter your page.
Upload your own photo
- 1
Open the Upload tab
In Banner Only or Banner + Circle, click Upload, then Choose File. JPEG, PNG, WebP and GIF work, up to 5 MB, and iPhone HEIC photos are converted for you. You can also paste an image link.
- 2
Crop it
Drag the photo and use the zoom slider until the part you want fills the banner frame.
- 3
Add the circle photo
For Banner + Circle, open the Circle tab and upload the second photo. Drag and zoom it inside the circle; Reset to center undoes that.
On layouts that frame the photo (Editorial, Polaroid, Magazine Cover and the other photo layouts), use Adjust on the photo to move and zoom it inside its frame.
Generate a banner with AI
- 1
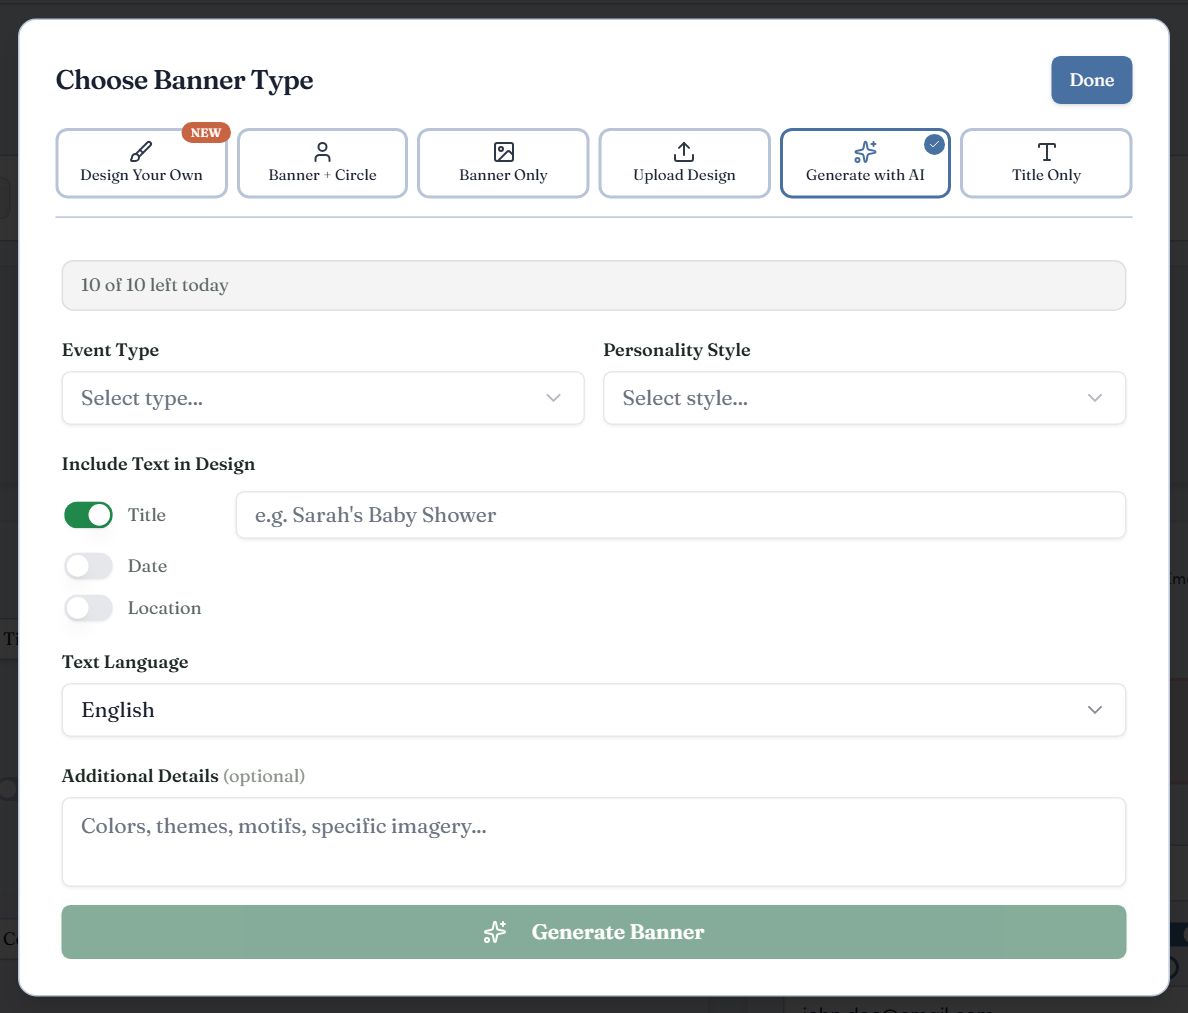
Pick an Event Type and a Personality Style
These set the subject and the mood of the drawing.
- 2
Decide what text to print
Under Include Text in Design, switch on Title, Date or Location and type what should appear. Leave them off for a picture with no words.
- 3
Add details, then press Generate Banner
Additional Details takes colors, themes or motifs. When the image appears, press Use This Image or generate again.
Design your own photo invitation
Design Your Own builds an invitation picture from a design, your photo and your words. There are 58 designs to start from.
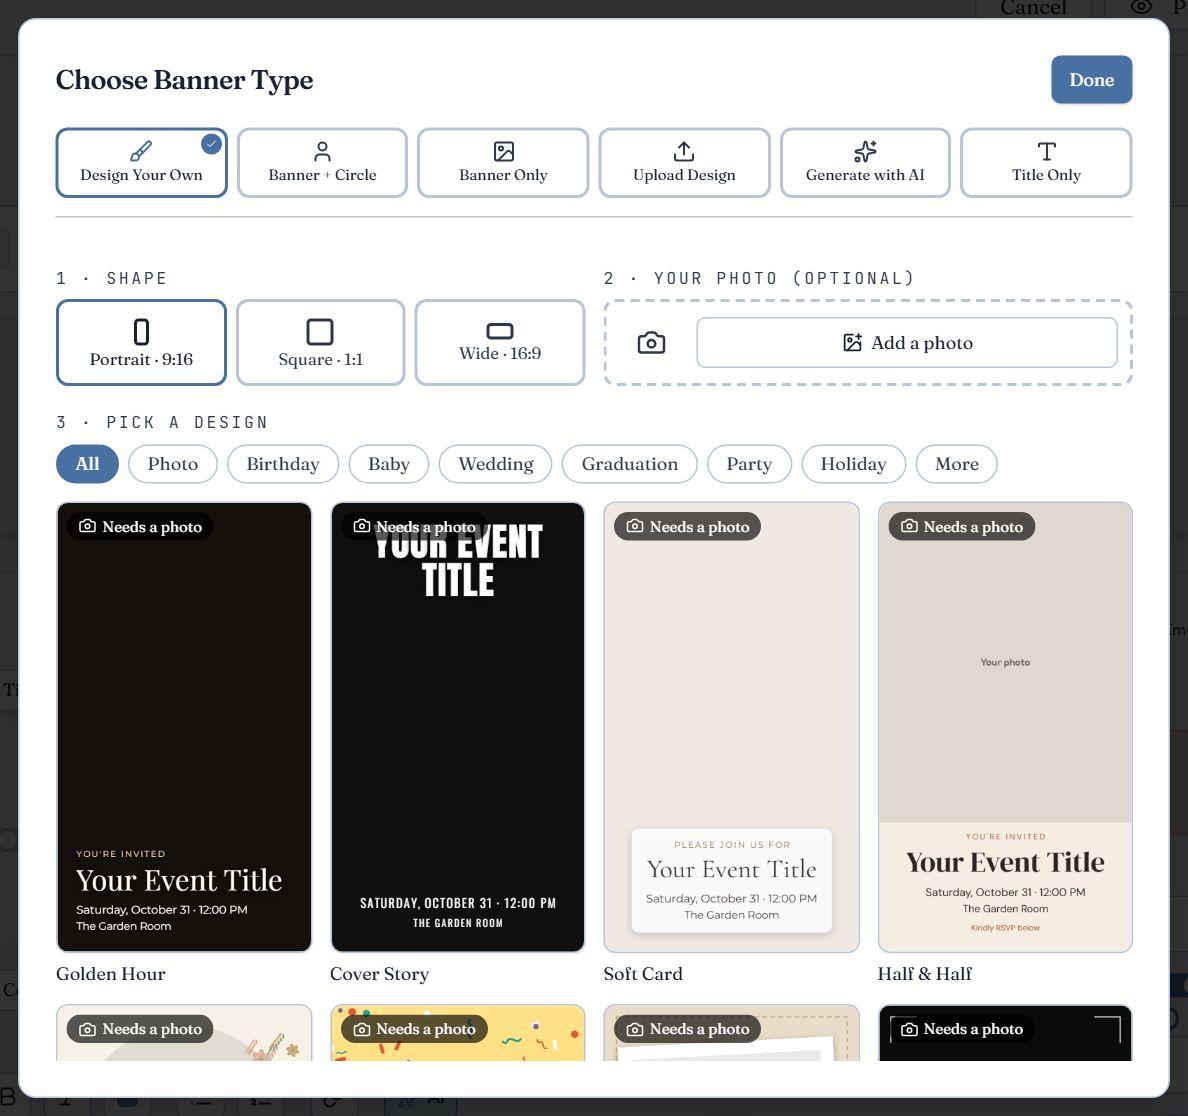
Pick a shape (portrait, square or wide), add a photo if you have one, then pick a design. Designs marked Needs a photo are built around a picture.
Your title, date, time and location are filled in for you. If you change them on the event later, the invitation offers to update itself.
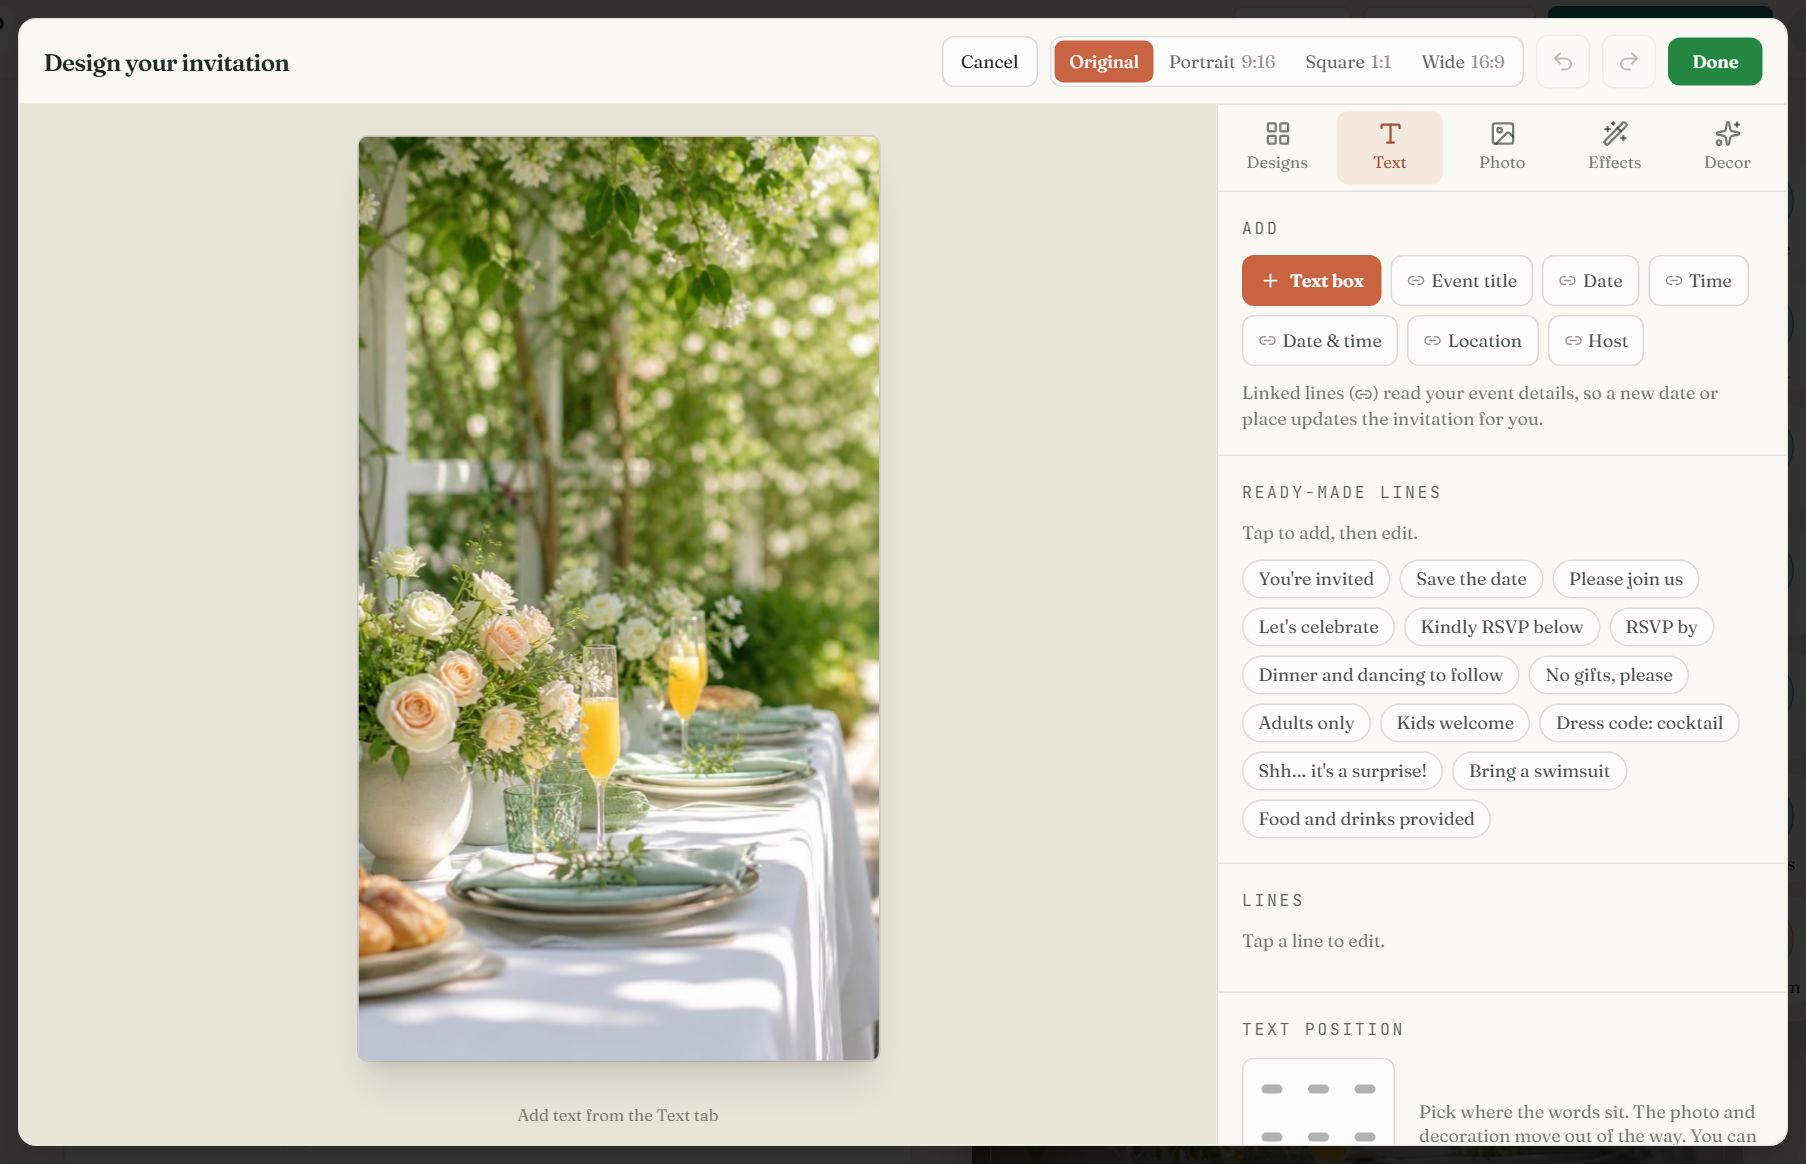
Swipe sideways to see the whole screen, or tap it to enlarge.
The studio. Changes are kept when you press Done.
| Tab | What you change there |
|---|---|
| Designs | Swap to another design, or change the shape. |
| Text | Add lines, pick ready-made wording such as “Save the date”, and set font, size, color and position. |
| Photo | Add or replace the photo, its shape and zoom, and the background color behind it. |
| Effects | Photo effects (vignette, fade, darken, blur, tint), a backing behind the text, and a motion accent for the Classic page. |
| Decor | Pictures or shapes around the words (balloons, florals, stars), their colors, size and amount, and a frame. |
Common questions
- Are banners free?
- Yes. All six banner types, the whole ready-made library and Design Your Own are free on every event. AI banners are free too, within a daily limit.
- What size should my banner photo be?
- Any reasonably large photo works, up to 5 MB. The Banner types crop to a wide strip, so a landscape photo fits best. Upload Design keeps your image's own shape, which suits a portrait invitation graphic.
- Can I put text on my own photo?
- Yes. Upload it with Upload Design, then press Add text to image above the page. Or start from Design Your Own, which lays out your title and date for you.
- Can I use an invitation I made in Canva?
- Yes. Export it from Canva as an image, choose Upload Design, and it is shown uncropped as the page's cover. The RSVP form sits underneath.
Still stuck?
Check the FAQ for quick answers, or send us a message and a person will reply.