Design your page
Title, date, location and description
These are the words on your page. Each one is edited where it appears: click it, change it, and press Save Changes.
Open your dashboard
Updated
Title, host and date
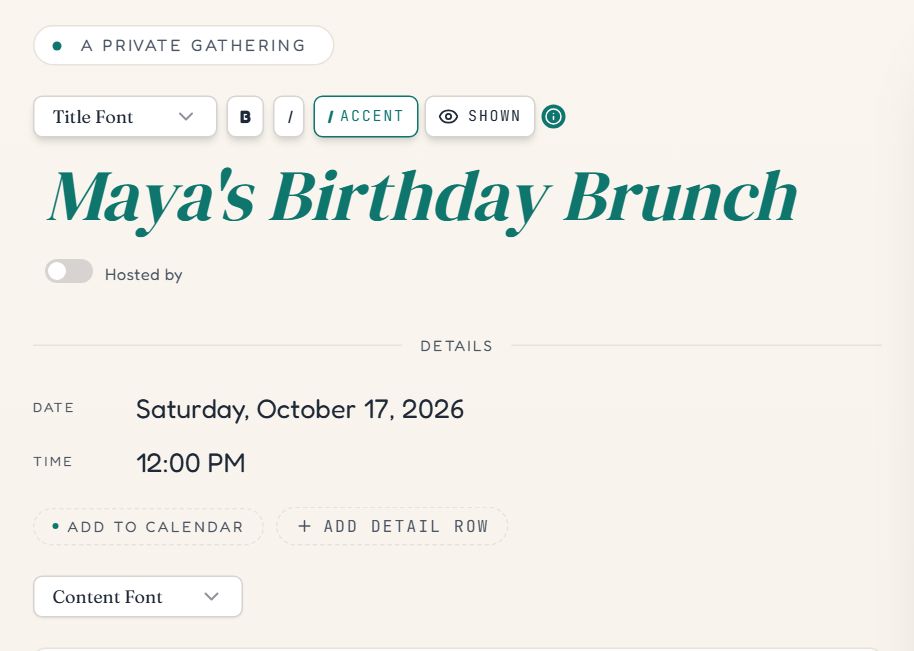
- 1Title. Click and type. Controls for font, bold, italic and accent sit just above it.
- 2Hosted by adds a line with your name under the title. It links to your profile if your profile is public.
- 3Date. Click to open the date picker.
- 4Time. Click to set the start, and an end time if you want one.
- 5Add detail row adds a labeled line such as Dress code, Parking or Gifts.
- 6Content Font sets the typeface for the details and description.
Set the date and time
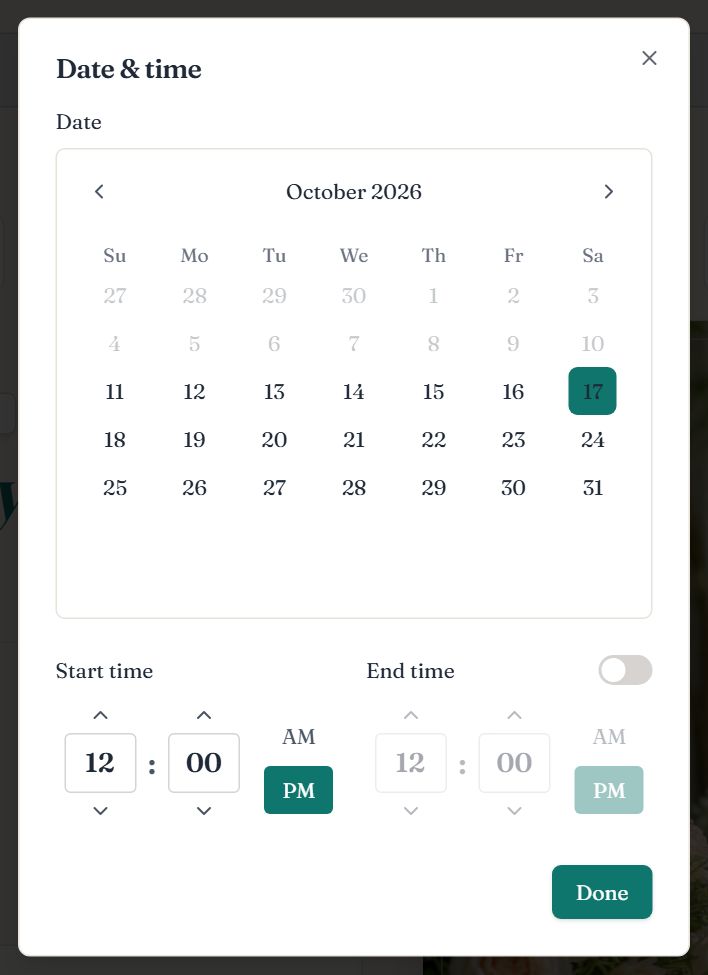
- Pick the day on the calendar, then the Start time.
- Switch on End time to show when the event finishes.
- Press Done. Guests get an Add to calendar button on the page automatically, with the title, time and location filled in.
Location and description
Scroll down the page in the editor to reach the note to guests and the location.
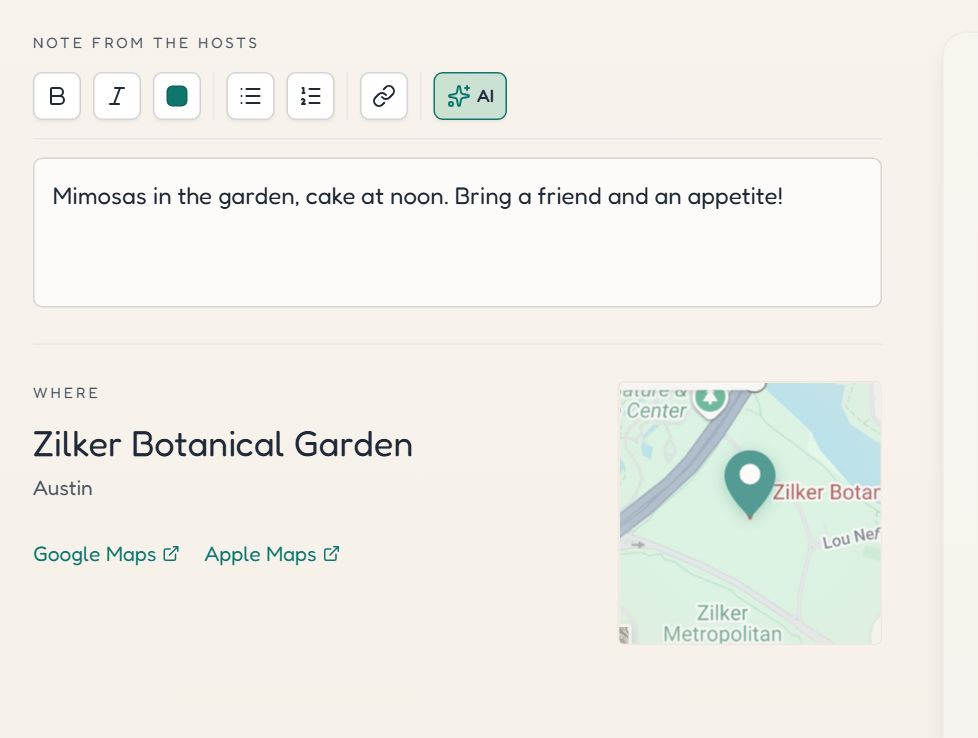
- 1AI writes a description for you from a few answers.
- 2The description. Type your note. The buttons above it add bold, italic, accent color, lists and links.
- 3Location. Click and start typing a venue or address, then pick it from the suggestions. Guests see a map.
- 4Google Maps and Apple Maps links are added for guests automatically.
- A description can be up to 2,000 characters. The counter counts what guests read, not hidden formatting.
- Text pasted from Word or Google Docs is cleaned up so it wraps properly on a phone.
- No venue yet? Leave the location empty, or type a plain line such as “Address sent after you RSVP”.
Write the description with AI
- 1
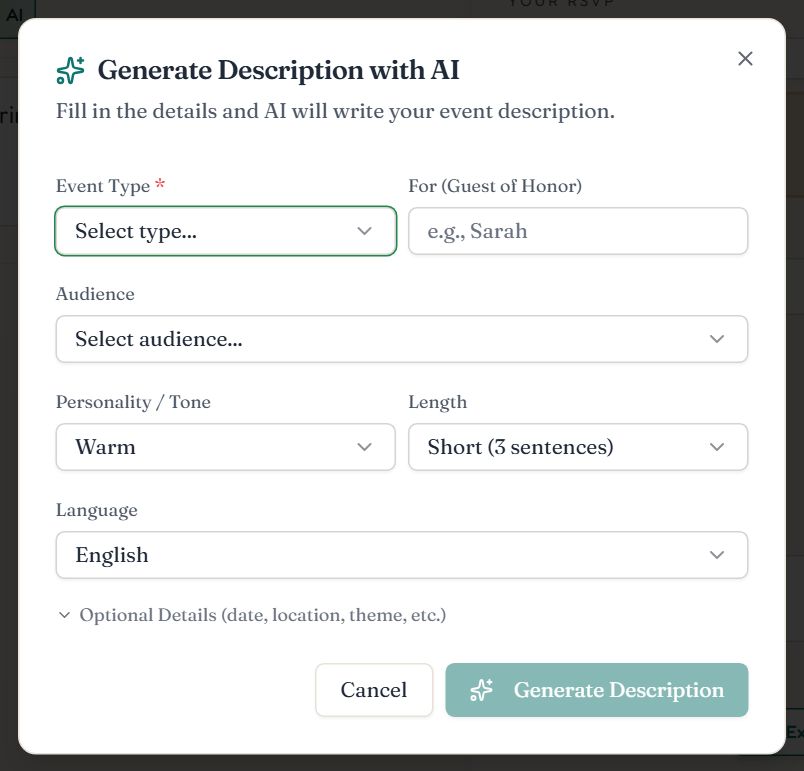
Press AI above the description
You need to be signed in.
- 2
Answer a few questions
Event Type is required. Guest of honor, audience, tone (Warm, Elegant, Funny and more), length and language shape the result. Optional Details adds theme, dress code and a gift note.
- 3
Press Generate Description
The text lands in the description box, where you can edit it like anything you typed.
Extra details, schedules and labels
- Detail rows. Press Add detail row for anything guests ask about: dress code, parking, registry, what to bring.
- Schedules. The Itinerary layout has a timed schedule, and the Menu layout has courses. Click a row to edit it; times shift with your event's start time until you set them yourself.
- Labels. Small printed labels (“A private gathering”, “Note from the hosts”, “Your RSVP”) can be reworded by clicking them, or hidden with the × beside them.
- Inscriptions. Some layouts list a few extra labels in an Inscriptions box, for wording that sits inside artwork.
Common questions
- Can I create an event without a location?
- Yes. Location is optional. Leave it empty for an online event or one where the address is shared privately, and add it later if you like.
- How long can the description be?
- Up to 2,000 characters of visible text. If Save names the description as too long, shorten it a little and save again.
- Can I change the date after sending the link?
- Yes. Edit the date and save. The same link shows the new date, and existing replies are kept. Tell your guests, since anyone who already added it to their calendar has the old time.
- Why can I not edit the title of my event?
- Once the event date has passed, the title, date, time, description and location are locked. RSVP settings stay editable.
Still stuck?
Check the FAQ for quick answers, or send us a message and a person will reply.