Getting started
How to create your first event on RSVPlinks
An event is one page with an RSVP form and one link to share. You can build it before you have an account, and it takes a few minutes.
Updated
1. Pick a starting design
Go to rsvplinks.com/create, or press Create Event on your dashboard. The first screen asks what you are celebrating.
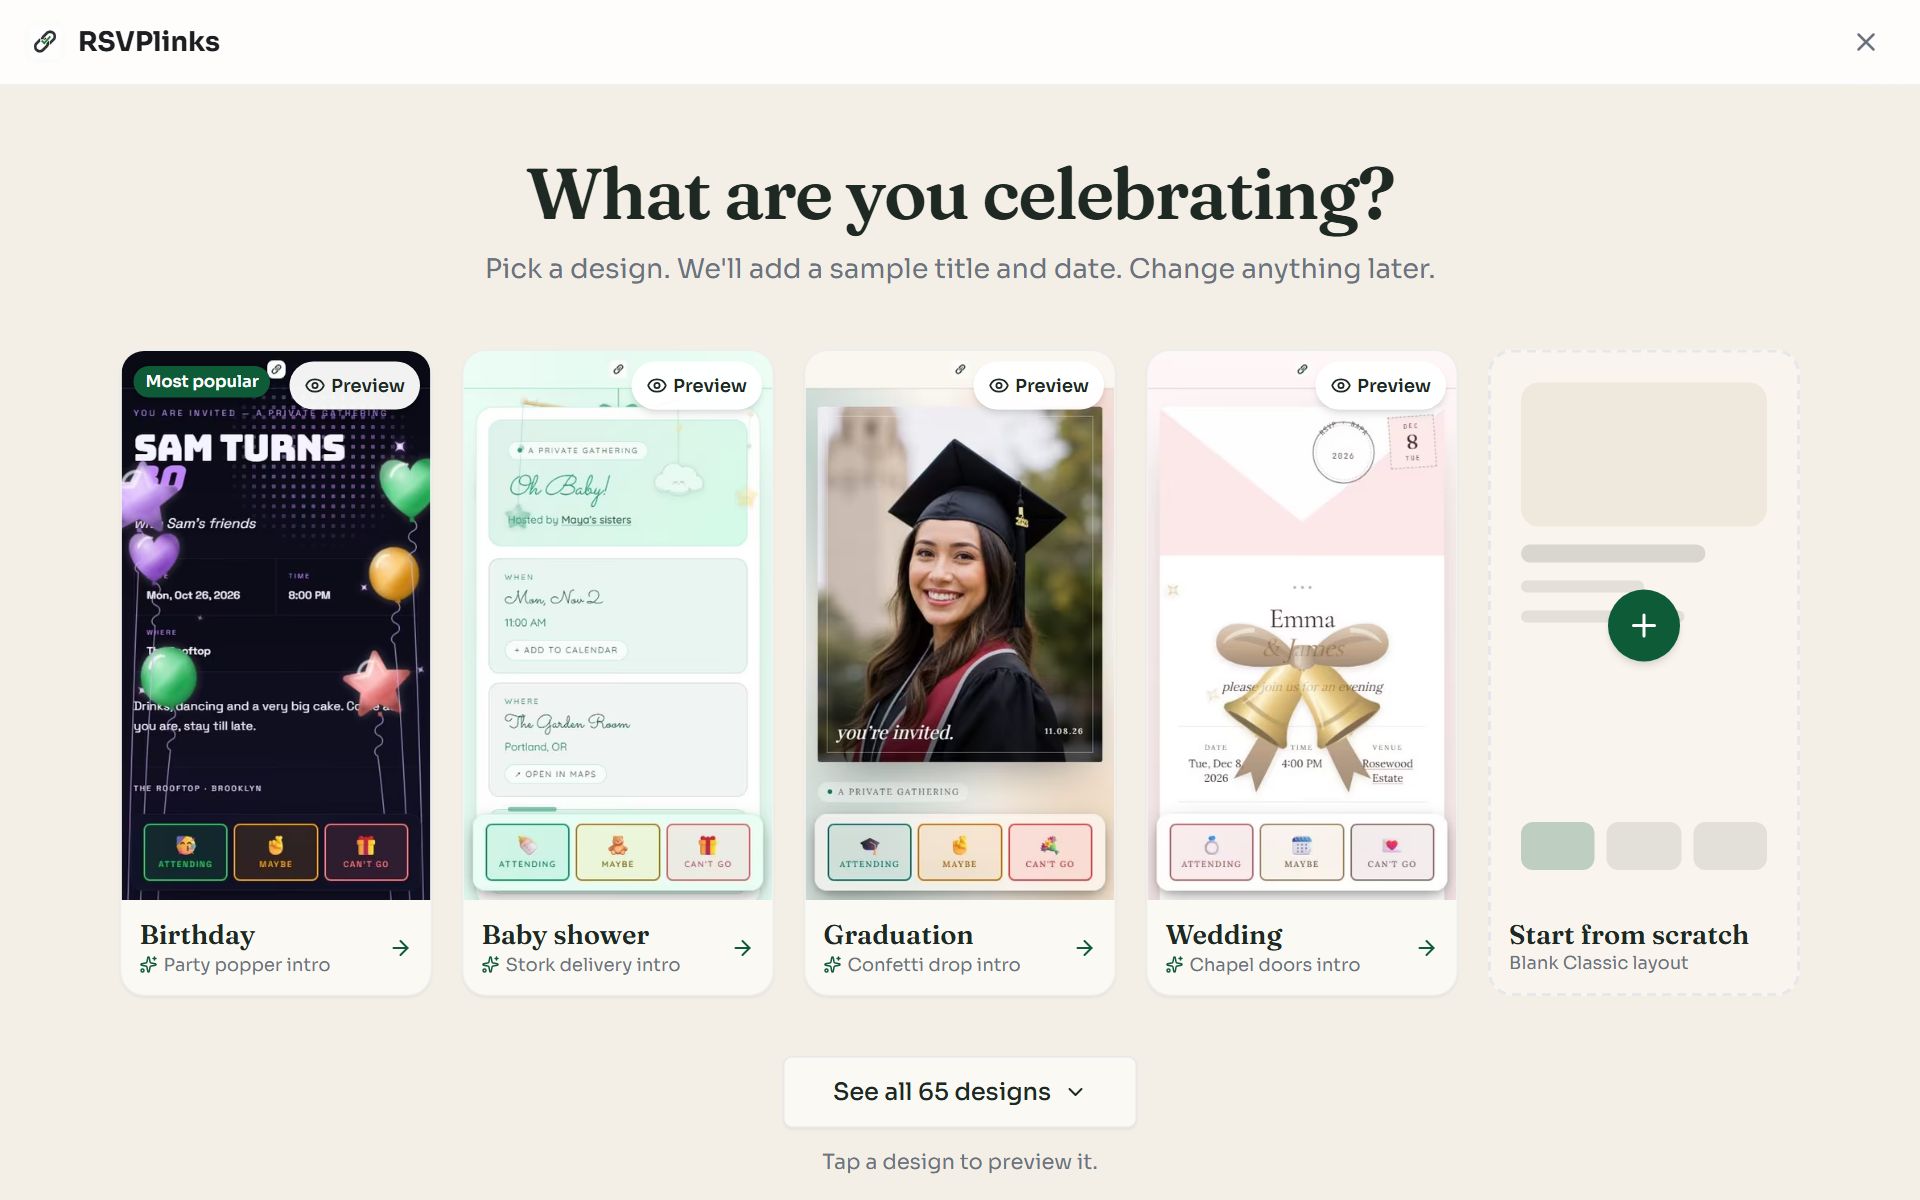
Swipe sideways to see the whole screen, or tap it to enlarge.
- 1A featured design. Tap a card to open the editor with that look, a sample title and a sample date. Preview plays it as a guest would see it.
- 2Start from scratch opens a blank Classic page.
- 3See all 65 designs opens the full gallery, sorted by style and occasion.
2. Add the essentials
The editor is the guest page itself. Click a part of the page to change it. An event needs a title and a date before it can be created; everything else is optional.
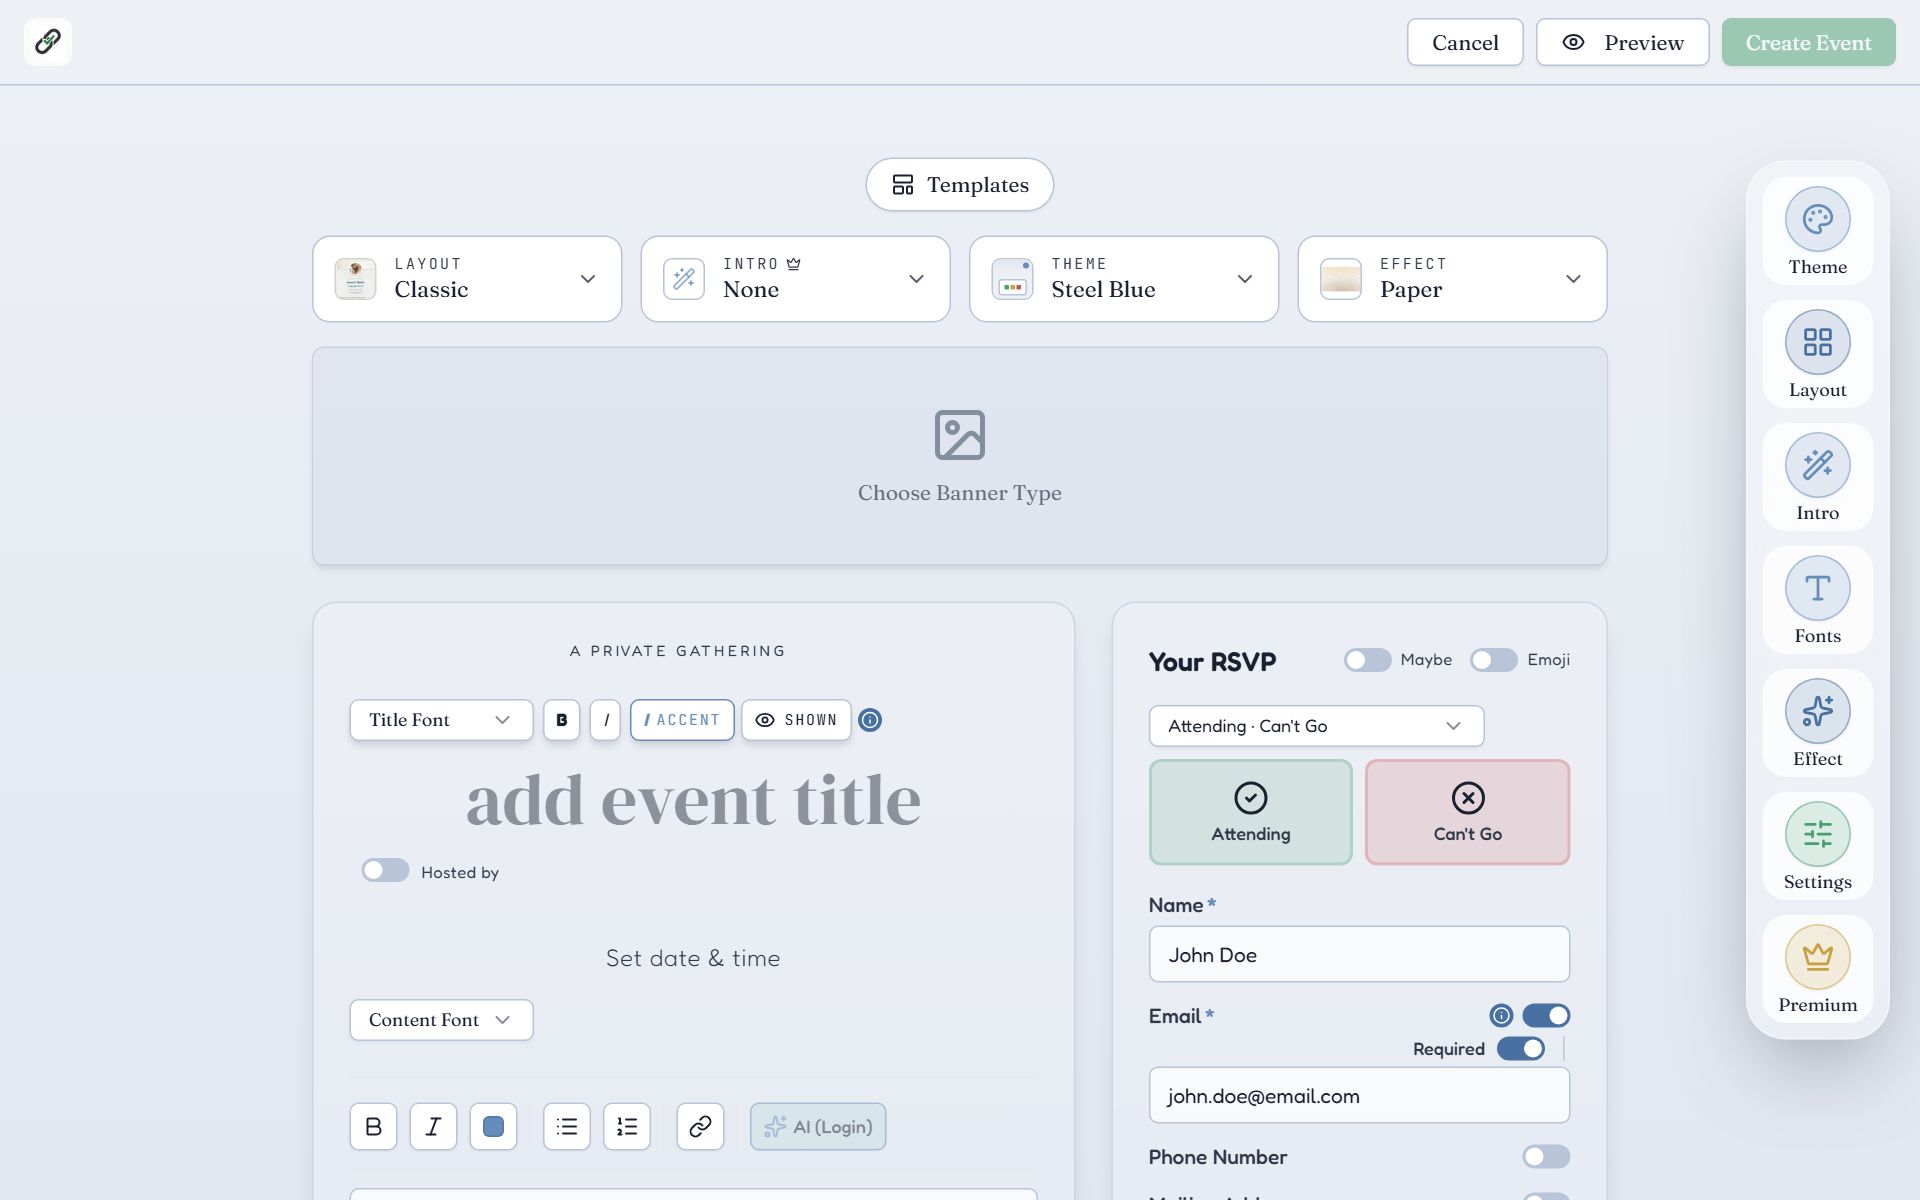
Swipe sideways to see the whole screen, or tap it to enlarge.
- 1Templates swaps the whole look at any time.
- 2Choose Banner Type adds a cover: a photo, a ready-made banner, an AI design, or no banner at all. See Banners and cover images.
- 3add event title is where the event name goes.
- 4Set date & time opens the date picker. An end time is optional.
- 5Create Event publishes the page.
- Add a location and a note for guests further down the page. See Title, date, location and details.
- The RSVP form on the right is a live preview. The switches beside each field decide what guests are asked. See RSVP form and settings.
3. Press Create Event
- 1
Press Create Event
It is the green button at the top right. If a required field is empty, a message names it.
- 2
Sign in or make an account
If you are not signed in, you are asked now. Use an email and password, or continue with Google. New email accounts confirm with a six-digit code sent by email. Your design is kept while you do this.
- 3
Arrive at the event dashboard
The event is live as soon as it is created, and you are taken to its dashboard, where replies arrive. See The event dashboard.
4. Share the link
Every event has one link. Anyone who opens it can read the page and reply. Guests do not need an account or an app.
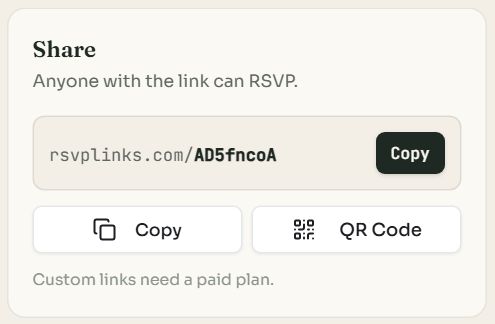
- 1Your event link. On a paid event you can replace the random ending with your own words.
- 2Copy puts the link on your clipboard, ready to paste into a text, email or group chat.
- 3QR Code gives you a code to print on a paper invitation or a sign.
More ways to send it, including tracked email invites, are in Share your event.
What a free event includes
A free event collects up to 20 RSVPs, and an account can hold 5 free events. All 65 templates, 43 layouts, 220 color themes and 122 page effects are free, and so are the share link, QR code, live guest list and CSV export.
Paying for an event (from $7, once, not a subscription) raises the RSVP limit and unlocks a custom link, custom questions, guest limits, reminders and more. See Paid events, plans and credits.
Common questions
- Do I need an account to create an event?
- Not to start. You can pick a design and fill in the page first. You are asked to sign in or sign up when you press Create Event, and your work is kept.
- Do my guests need an account or an app to RSVP?
- No. Guests open the link in any browser, tap a reply and submit. Nothing to install and nothing to sign up for.
- How many events can I create for free?
- 5 free events per account, each with up to 20 RSVPs. Paid events do not count toward that limit. An account can have up to 15 upcoming events at once.
- Can I change the design after the event is live?
- Yes. Open the event, press Edit, and change the template, layout, colors, fonts or cover. Guests see the new look the next time they open the link. The link itself does not change.
Still stuck?
Check the FAQ for quick answers, or send us a message and a person will reply.