Getting started
A tour of the event editor
The editor shows your page the way guests will see it, with controls around the edge. This is what each control does and where to find it.
Updated
Opening the editor
- A new event: press Create Event on the dashboard, or go to rsvplinks.com/create.
- An existing event: open it from the dashboard and press Edit, or use the three-dot menu on its row and choose Edit.
How the editor is laid out
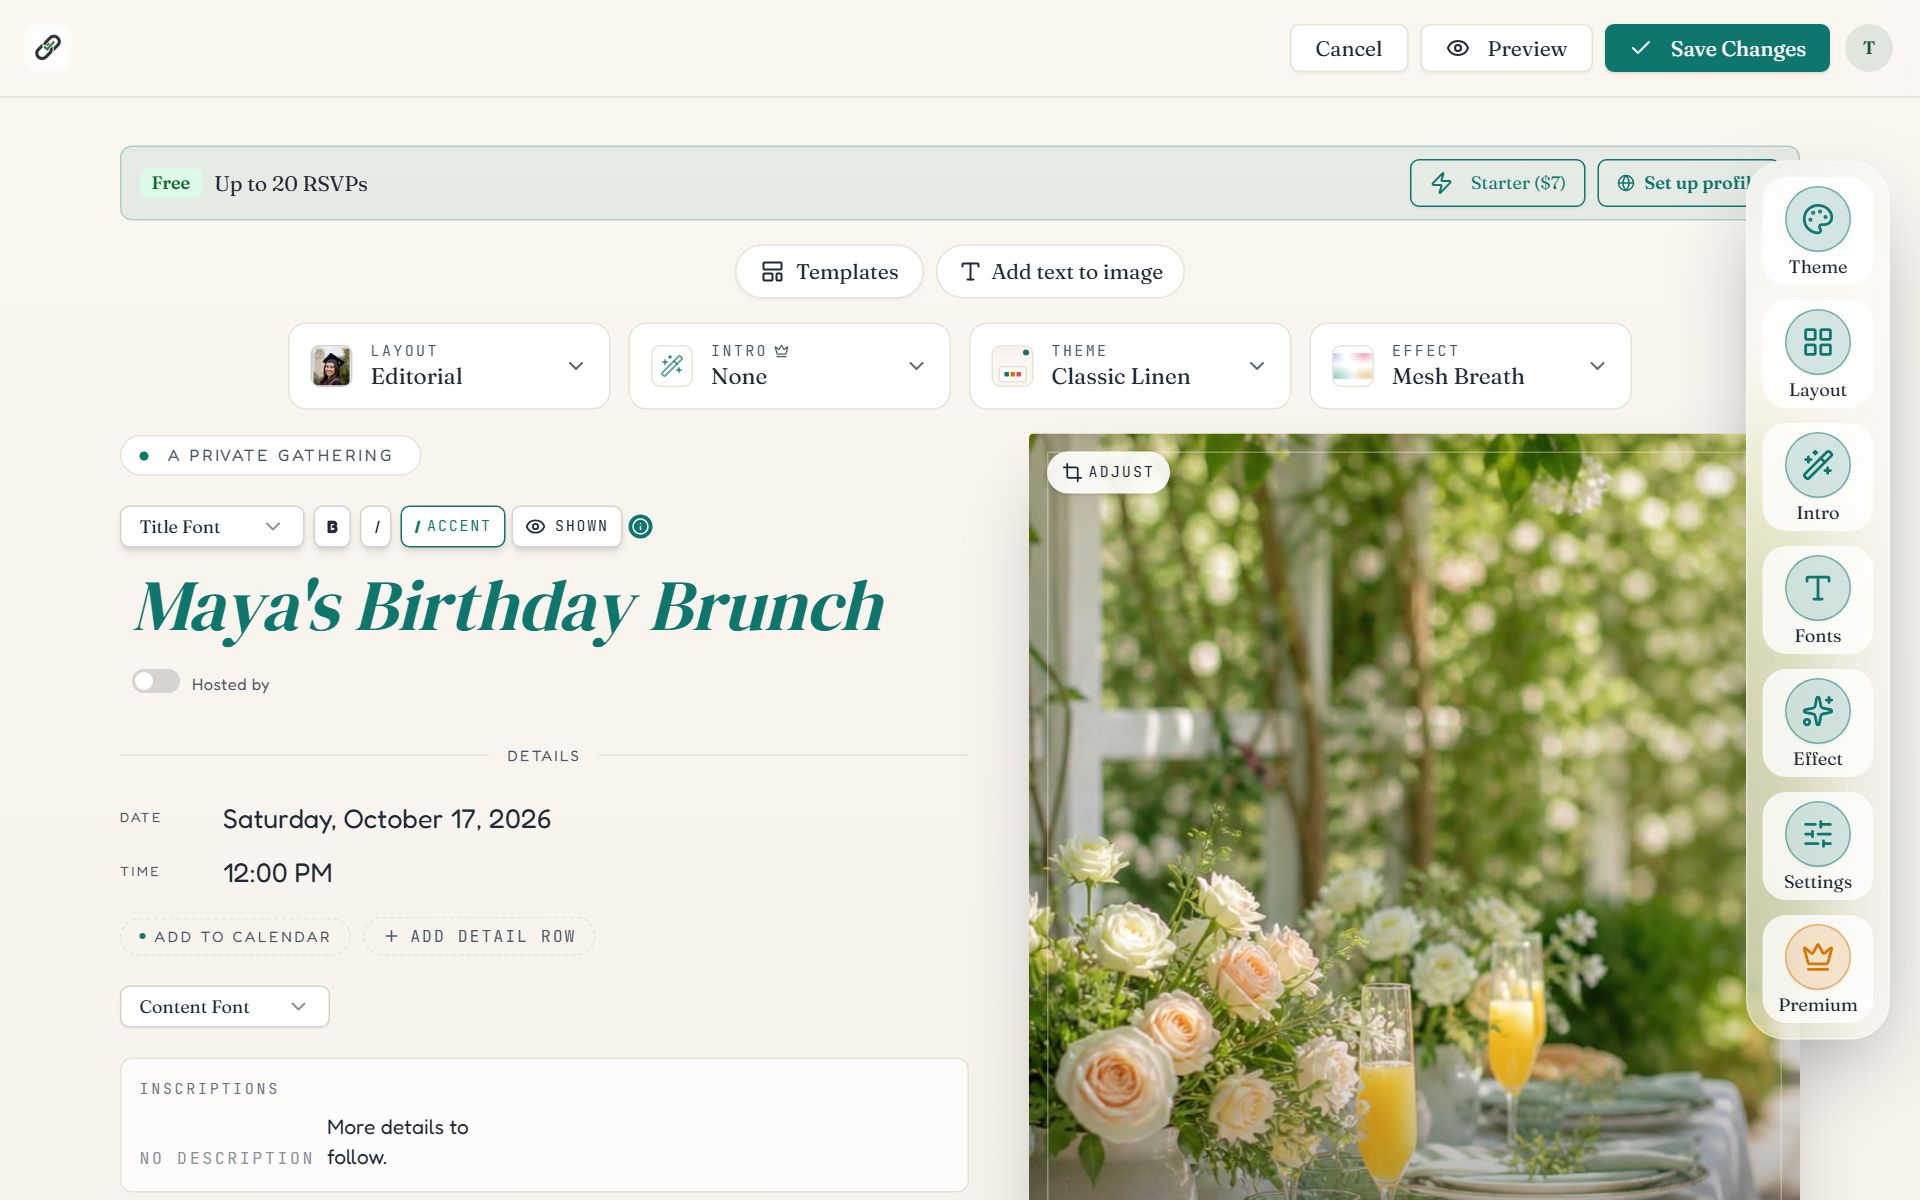
Swipe sideways to see the whole screen, or tap it to enlarge.
- 1Plan strip. Shows the event's plan and RSVP limit, with a shortcut to upgrade.
- 2Templates. Swaps layout, colors, fonts, effect and intro in one step. Your details and settings stay.
- 3The four pickers: Layout, Intro, Theme and Effect. Each opens a panel of choices and applies the one you click.
- 4The side rail. Theme, Layout, Intro, Fonts, Effect, Settings and Premium. On a phone this is a bar along the bottom.
- 5Preview shows the page exactly as a guest sees it.
- 6Save Changes (or Create Event on a new event). Nothing reaches guests until you press it.
Editing on the page
Most of the page is edited in place. Click the thing you want to change.
- Title, date, time and location: click them. See Title, date, location and details.
- The cover: click it, or use Change cover photo and Adjust photo. See Banners and cover images.
- Small labels such as “A private gathering” or “Your RSVP”: click to reword. The × beside a label hides it from the page.
- The RSVP form: flip the switch beside a field to ask for it or not. See RSVP form and settings.
The side rail
Each rail button opens a panel on the right (a sheet from the bottom on a phone). The row of icons at the top of the panel jumps between them.
| Rail button | What it opens |
|---|---|
| Theme | The 220 color themes, grouped by mood. More |
| Layout | The 43 page layouts. More |
| Intro | The opening animation guests see first. Paid events. More |
| Fonts | Title font and content font. More |
| Effect | Animated backgrounds such as confetti or snow. More |
| Settings | What the RSVP form asks and how guests reply. More |
| Premium | Paid options: custom link, guest limits, reply-by date, custom questions, sign-up list, emails. |
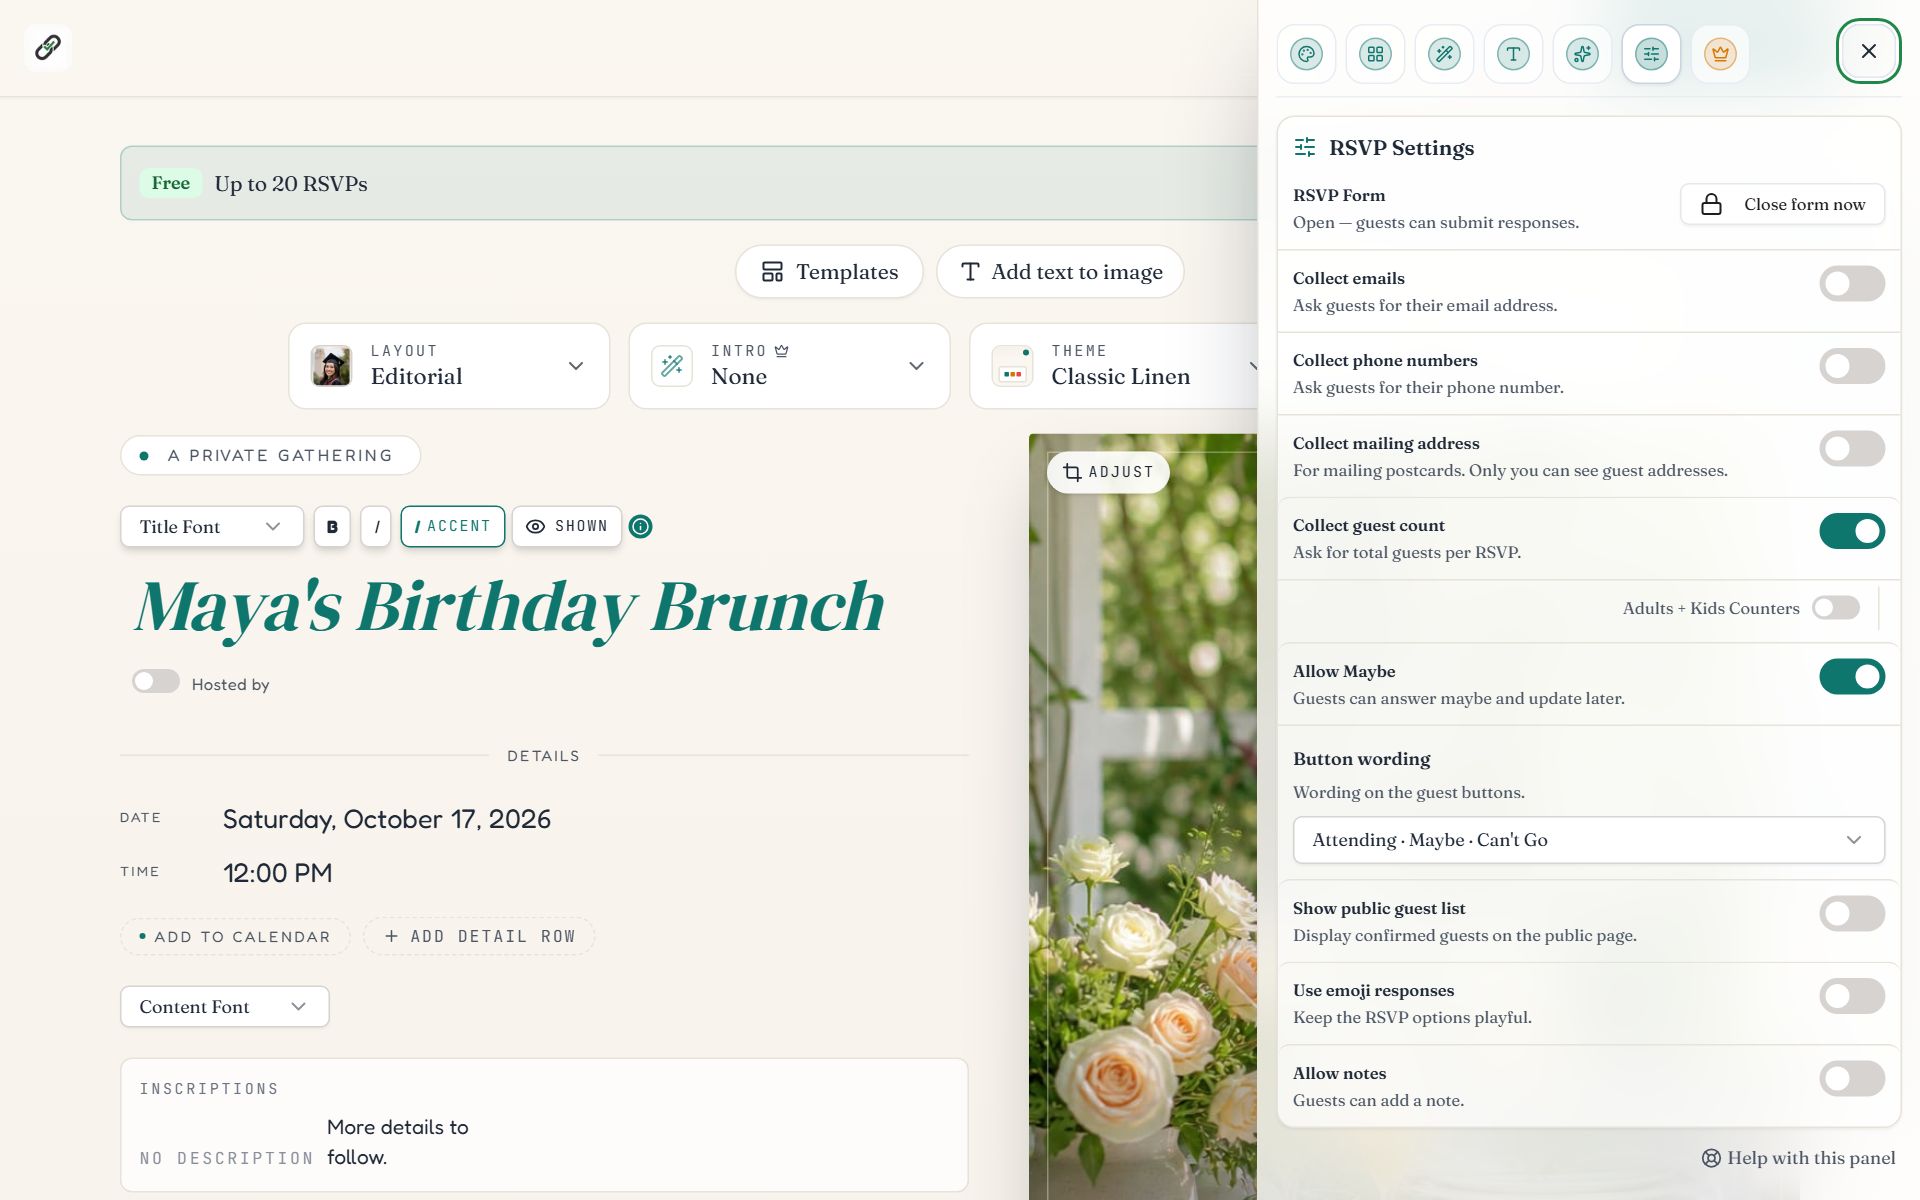
Swipe sideways to see the whole screen, or tap it to enlarge.
The Settings panel. The icons across the top switch to the other panels.
- 1Close form now stops new replies without taking the page down.
- 2Allow Maybe adds or removes the middle reply button.
- 3Button wording changes what the reply buttons say to guests.
Preview as a guest
Press Preview to hide the controls and see the finished page, with the intro and page effect playing. Press Exit preview to go back to editing. Preview does not save.
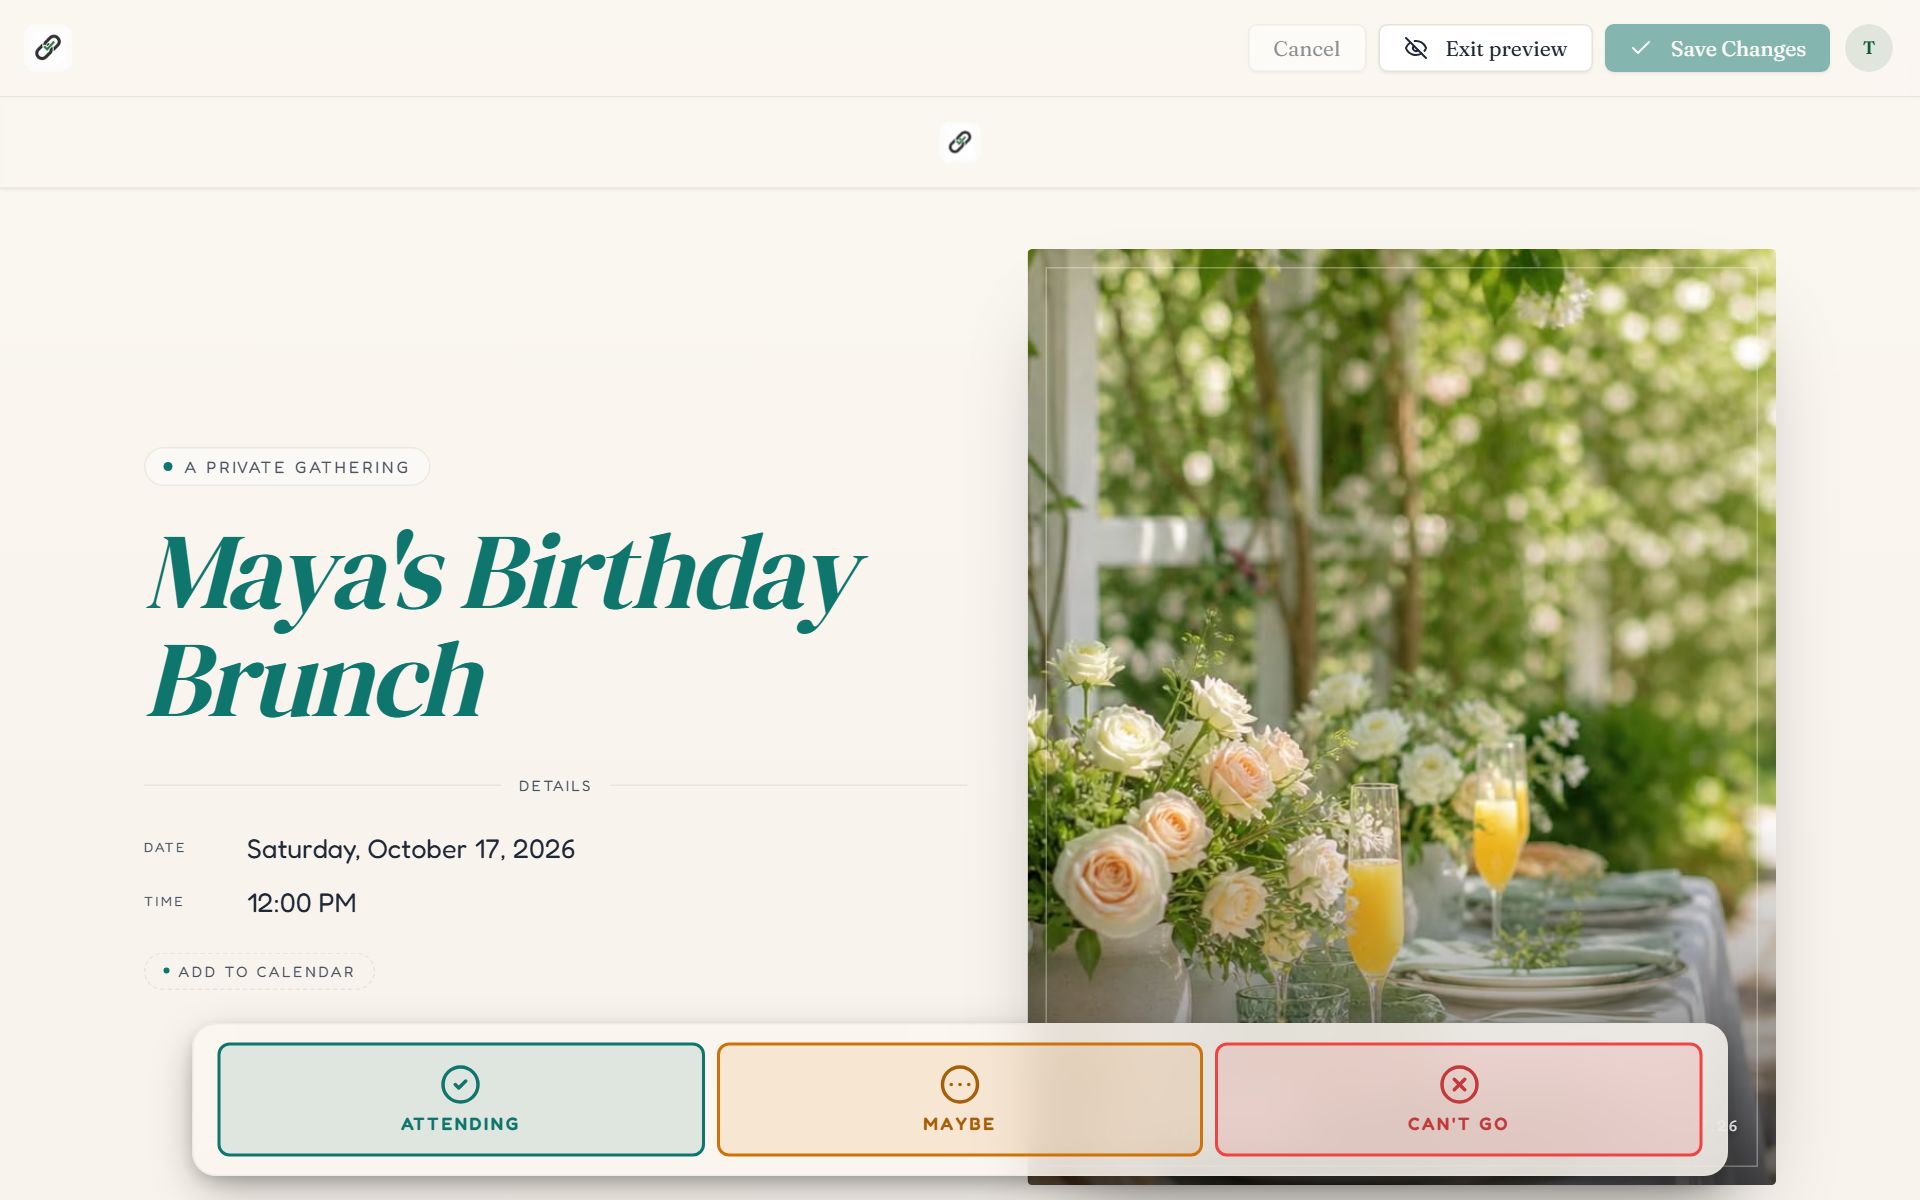
Swipe sideways to see the whole screen, or tap it to enlarge.
- 1Exit preview returns to the editor.
Saving and leaving
- Save Changes publishes your edits. Guests see them the next time they load the page.
- Cancel, or leaving the page with edits, asks first: Keep editing or Discard.
- If a required field is empty or a description is too long, Save stops and a message names the field to fix.
- After the event date has passed, the title, date, time, description and location lock. RSVP settings can still be changed.
Common questions
- Do guests see my changes while I am editing?
- No. Guests see the last saved version. Your edits go live when you press Save Changes.
- Can I edit an event from my phone?
- Yes. The editor works in a phone browser. The side rail becomes a bar along the bottom of the screen, and each button opens a sheet.
- Why are the title and date locked on my event?
- The event date has passed. Past events keep their details as guests saw them. You can still change RSVP settings, view the guest list and export it.
- Will switching template or layout delete my details?
- No. Title, date, time, location, description, RSVP settings and guest replies stay. Only the look changes, and applying a template shows an Undo.
Still stuck?
Check the FAQ for quick answers, or send us a message and a person will reply.